Image credit – imagesource
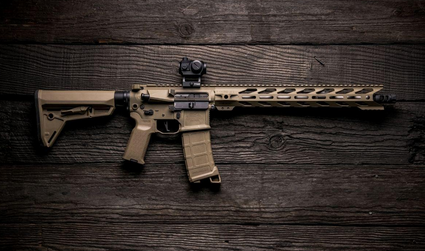
One of the most satisfying things a gun owner can do is build the lower receiver of an AR-15. It is one of the most effective ways to learn to use your new AR-15 weapon. The advantage of the AR platform is that it allows anyone to customize their weapon.
By using an 80% lower, you’re in control of the whole building process and can create the perfect custom firearm. Here are the seven best ways to help you customize lower receivers with just a few basic tools and a few specific accessories.
- Install Trigger Guard
The first step is to install the trigger guard on the lower receiver. You will require a trigger guard roll pin, trigger guard screw, and trigger guard for this step.
Start by inserting the trigger guard in its slot at the receiver’s bottom. Then, insert the trigger guard screw into the front hole of its slot, using the appropriate Allen wrench.
- Install Bolt Catch
Drop the plunger into the hole at the magazine’s top clip with the spring. Place the bolt catch in the proper position and lower it.
Alternatively, you can use a punch all the way. Then, the last bolt catches with a little bit of mating.
- Install Trigger Group
Fitting the hammer and trigger springs is the first step in installing the trigger group. Next, install the hammer spring by wrapping the coils around the posts on the hammer’s side.
The trigger spring coil should be wrapped around the posts around the trigger. Spring’s squared loop fits under the front spread of the trigger, the spring’s legs will extend from the trigger to the bottom, and the feet will be upwards at the ends of the spring legs.
- Install the Selector Switch & Pistol Grip
Place the selection spring at the pistol grip’s top. Next, remove the spring and pistol grip from the equation. Next, turn your lower receiver upside down.
Place the selector detent under the lower receiver in the hole to the pistol grip’s right side. When placed correctly, the detent’s tip must be placed towards the aperture for the selector switch.
Now, put the selector switch through the hole at the bottom left of the receiver for the selector switch.
- Install Buffer Tube
Start inserting the buffer tube into the receiver’s back. Thread the castle nut down to lock the endplate in place.
As soon as the buffer tube’s front tip is just less than flush with the opening at the buffer’s top region, stop threading. Instead, retainer spring should be inserted, then the buffer retainer, into this hole at the receiver’s top.
- Install Takedown Pin
Insert it in the takedown pinhole on the receiver’s back to install it. The pin channel notch should face the back of the receiver. Next, insert the takedown pin detector and then the takedown pin into the rear face hole of the spring receiver.
- Staking the Castle Nut
To put the castle nut at stake, place the punch tip on the lower receiver end plate and endplate’s upper part to suit the small stacking notch of the casting nut. To make a dimple on the last plate, beat the corn while keeping it upside down. After making the dimple, give the punch an angle of about 45 degrees, the upper part of the punch facing the receiver’s front.
To restrain the castle nut from being backed out, hit the endplate to press the metal into the castle nut mark.
While this can be scary, building your own AR-15 lower receiver is not as difficult as it may seem. With this guide and the right gear, you will be ready to move your AR-15.
