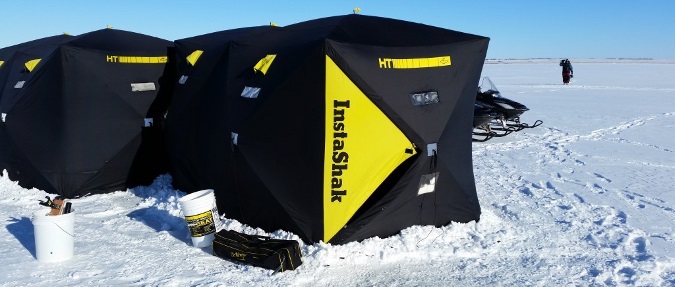
I think most ardent ice anglers have either purchased, had an opportunity to fish from or at least try out one of today’s hub shelter designs ( hub shelters from HT are what anglers should look at for their next adventure ). The advantages are many: They’re reasonably priced; largely self-contained with no loose parts, easy to set up and break down, relatively lightweight and compact–making them easy to stow and transport; and “thermal” models are well insulated, so they stay comfortably warm and dry, too.

The downside is their lightweight properties make them somewhat lofty, so handling them in strong winds can be challenging, and the frustrations only mount when that wind is blowing hard and temperatures have plummeted well below zero.
Now complicate that times ten if you somehow manage to get the structural hubs, poles and associated joints turned out of position…and I haven’t even mentioned the fun of stuffing the whole thing back in those carry bags, something I swear are made a half inch shorter than will accommodate a cold, fully stretched ice-covered shelter just to test the limits of an ice angler’s patience!
H ere are some thoughts that will help keep your experience positive:
- WHEN INITIALLY TAKING HUB SHELTERS OUT OF CARRY BAGS, ALWAYS SPREAD THE FRAME OPEN GENTLY—THE POLES SHOULD EASILY DROP INTO PLACE. THERE IS NO NEED TO APPLY EXCESSIVE PRESSURE OR FORCE THEM INTO POSITION, WHICH MAY CAUSE DAMAGE TO POLE CONNECTIONS.
- ALWAYS POP THE TOP HUB(S) INTO PLACE FIRST, FOLLOWED BY THE SIDE PANELS.
- ONCE FULLY OPENED, ALWAYS USE SHELTER ANCHORS, SECURING THE WALL FACING INTO THE WIND FIRST BEFORE ATTACHING AN ANCHORED GUIDELINE TO THE CENTER HUB AND SNUGGING THE ROPE TIGHT.
- WHEN USING LARGER MODELS, POSITION YOUR SHELTER WITH THE NARROWEST END EXPOSED TO THE WIND, RATHER THAN BROAD SIDE. AGAIN, BE SURE TO PLACE A SHELTER ANCHOR IN BOTH CORNERS OF THE WIND EXPOSED PANEL,
 AND AN ANCHORED GUIDELINE IN THE CENTRAL HUB BEFORE PLACING CENTRAL ANCHORS ON BOTH SIDES AND THE FAR CORNERS. ADDITIONAL ANCHORED GUIDELINES SHOULD BE USED ON THE REMAINING PANELS AS DICTATED BY WIND STRENGTH AND DIRECTION.
- IF SNOW IS AVAILABLE, EXTEND THE PERIMETER BASE FLAPS OUT FLAT, AND COVER THEM WITH SHOVELED SNOW (DON’T USE SLUSH, AS THIS MAY FREEZE THE FLAPS DOWN, MAKING PACKING AT THE END OF THE DAY DIFFICULT—AND APPLYING FORCE WHEN TRYING TO LOOSEN FROZEN DOWN FLAPS MAY RESULT IN DAMAGE TO STITCHING OR THE MATERIAL ITSELF AS YOU’RE PACKING UP.
Check out a step by step pictorial guide for setting up a hub style shelter by clicking here!!!
- FOR BREAK DOWN, BE SURE TO COLLAPSE THE TOP HUB(S) FIRST, FOLLOWED BY THE SIDE ONES.
- WHEN COLLAPSING AND FOLDING THE FRAME, LOOSELY GATHER THE BASE FEET, AND GENTLY FOLD THE POLES TOGETHER—THERE IS NO NEED TO APPLY EXCESSIVE PRESSURE OR FORCE THEM INTO POSITION. THEY SHOULD COLLAPSE EASILY.
- ONCE YOUR SHELTER IS FOLDED INTO THE COMPACTED FORM, STAND THE COLLAPSED UNIT UPRIGHT ON THE BASE FEET, THEN, HOLDING THE CARRY CASE VERTICALLY, GATHER AND PLACE THE BASE FEET INTO THE BOTTOM OF THE CASE, AND WORKING UPWARD, BEGIN WRAPPING THE CARRY CASE GENTLY AROUND THE SHELTER AS YOU FOLD AND TUCK EXCESS MATERIAL INSIDE BEFORE SLIPPING THE OPPOSITE END OF THE BAG OVER THE TOP OF THE COLLAPSED SHELTER.
- LAY THE CARRY BAG DOWN FLAT, THEN GENTLY ZIP IT CLOSED WHILE CONTINUING TO TUCK AWAY ANY EXPOSED MATERIAL.
- FINALLY, ONCE YOU’RE BACK HOME, ALWAYS REMOVE WET SHELTERS FROM THE CARRY BAG, ALLOWING THEM TO DRY THOROUGHLY BEFORE STORING THEM AWAY.
Used properly, hub shelters are a great design—and one you’ll find make cold days on the ice much more enjoyable.
HT Video on hub shelters
